Friday, January 29, 2010

Into the Booth..

Finally. Yay. Almost finish product.

The not-so-working vented hood. Custom made according to my taste.

See ya on Monday!

DIY : Polishing My Old Lenses.

Here's another DIY stuff for the day. Told ya I was too bored.

Subject : KE70 DX stuffs. Yes, I have a new set of these stuff. But where is the fun part of having an oldschool machine if I didn't try to restore it?


Dirty lenses ready to be polished.


The first step is cleaning up the lenses to remove dust.


My Super Duper Polishing Machine (SDPM) created with a drill machine strapped with old towels.


Put some headlamp polish on the lenses. Spread it evenly and wait for it to dry. Then buff em up with the SDPM. See da difference? The top one is not polished yet.


Before and after. Polish it 2-3 times depending on your mood. The more you do it, the more shine you will get.


One of the secret is to buff the lenses till it become hot at the surface. But not too hot till it melt the lenses. Spread with the SDPM evenly and do not stay at a place for too long.


Walla~ Done.

DIY : Florescent Rims.

Subject : Dull 15' Fondmetal wheels.


The first step is to clean up the wheels. Use a detergent to make sure there is no dirt or oil left.


Sand it like there's no tomorrow. Just a light pressure is enough to wash away the top layer of the paint.


After that, dried it up and it is ready to be painted.


The spray cans consist of Flat White, Florescent Orange and the other that I forgot to buy is Clear Coat. The reason I choose Flat White as a primer is because flat color usually has rough surface, and white color will reflex the florescent color quite well and it is much easier to detect the unevenness when you are spraying the orange color.


Flat White as a primer. 4-5 layers should be enough. As for me, 1 can is for 2 wheels, so I just sprayed it layer by layer till the can is empty. Put more layer at the lip and the bolt area coz that is the usual place that will be scratched. The reason I didn't tape up the tires are because that is a set of bald tires that will be changed soon. Save up some of my time too.


Check for bubbles or unevenness at each layer. Sand it lightly to remove it.


The hard part is the first layer of Orange. Check out the unevenness. Well, the solution for this problem is just to wait for it to dry. Then touch up the area that is still in white color till every part of the rims have the same color. The color is too bright till my camera cant really focus on it.


Spray, spray and keep spraying.


And the results? Oh, don't forget to spray a few layer of clear coat so that the rims will be shining and less brake dust will stick.


Since my car will be white, it should turn up like this.

Saturday, January 16, 2010

I am Tired!

After 5 hours of hard work and a lot of sweat, the car is ready for the trip today! The front panel still a problem, need to realign it back once I returned the car. Some more, the bumper is forced fit, the grill and the head lamp too. 5 hours of pain. From 4 pm till 9pm. Working in a dark place is a bonus. Was using some lights from Getz. LOL. A lot of grinding, especially the old side mirror that had been WELDED to the body, the vented hood need some magic touch after this, and what not.

Some sneak preview while the car was super dirty :


Should I retain the body line should I remove it? Love the inter cooler now. Hiding between the bumper and the front lip. The fender mirror? Well, it is more on cosmetic rather than functioning. Only the right one is functioning.

Friday, January 15, 2010

Under the Coat.

Woke up in the morning today (Even though I don't have any class on Friday..), when Jimmy message me that the car key had broken into two pieces. So, I went to the shop and took the broken key and make a duplicate of it.


And all exterior stuff's had arrived. Finally. Thanks to Ipin for it!


I was told by Jimmy that the first layer of undercoat is to rule out or to find unevenness at the body. So, here's the first one. Hood and bonnet still not done anyway.


Kinda in love with the front fitment. Looks awesome!


Another view of the fitment. I wish I can lowered it a bit more to the ground. But definitely the front spoiler will scrapped everything on the road, so need to rethink again.


p/s - The intercooler looks fugly!

Thursday, January 14, 2010

Almost There.. Part III

Few units of emblem from Jeya! Yay! Thanks buddy! Most of em' looks almost new and in good condition.


Currently, the car is using 1jz stock inter cooler, I wonder what size is suitable if I am going to buy one of these?


And finally bought a set of bonnet pin. It is a must before my hood fly away and smashed the front windscreen.


Today, Jimmy give me a chance to drove Rolla around. It had been a week or so without Rolla. So, kinda happy to drove it around and fillin her up. Undercoat paint will be sprayed tomorrow I think..

Tuesday, January 12, 2010

Almost There.. Part II

Today's updates:

I need this missing clip for my rear windscreen. Need two of em.


Vented hood coming..


Finally manage to settle the front spoiler's issue. I removed the intercooler and then alter here and there a bit, and get the final position. The only problem left is the curve area. Still hanging. Might ask Jimmy to put a bracket to hold the downforce before it break into pieces. Kekekeke.


Rear arch in the making.


On the other hand, I better find a new girlfriend quickly or else this blog will be flooded with Rolla's story only. Hahahaha. Sunday Drive by Olskool.org is around the corner (This Sunday!). Will take Rolla for a spin and as a proper introduction to public. Also might use the opportunity to climb Genting. We'll see.

Monday, January 11, 2010

Almost There..

I knew I should not push Jimmy when he's doing his job. Kekeke. But being me, myself, a person who are obviously cannot wait, I had went to the shop and take a peek on my car. Although Jimmy was not around that time, I guess he's doing a lot of progress.

Some clearance issue on the front spoiler. Hmm. Hope it can be fitted nicely.


The car itself looking good now! Now, I'm in dilemma. Should I put the over fender or just shaped up the rear arch? Hmm.

Saturday, January 9, 2010

Spending My Saturday..

Woke up quite early, around 10am something coz Jimmy was calling me. He was telling me that the fender (the one he had shaped it up nicely) did not 'ngam' with the headlamp. Duh, I seriously thought the BlackBelt face lift and DX are using the same fender. So, get myself ready and went to the shop.

So, this is the new fender that had been shaped up nicely.
Image

Side view. Should I use the over fender or shouldn't I?
Image

And front view.
Image

Lesson 101 : BlackBelt fender with DX headlamp will not 'ngam'. Solution? Just closed my eyes. Hehehe. Too lazy to fork out some more RM to find a set of DX fender.
Image

How's da clearance? Less than 1cm! Jimmy surely knew what he's doing.
Image

While he's adjusting the hood, I got a chance to sneak peek inside the turbine. Argh, I wish I knew more about the turbo.
Image

By 4pm, most of the damaged area had been fibered. Usually, paint shop will just cement it. Jimmy said fill it with fiber first before cementing it.
Image

I was there from 11am till 4pm. Got a lot of tips from Jimmy on how to bend your direction and controlling your hands when cementing your car. Learning process is never fun if you are learning it theoretically. But by witnessing it myself, I guess that's the best method. Doing it yourself is even better. Cant wait to try it myself soon on my damaged fender.

Friday, January 8, 2010

Friday a.k.a Holiday.

I'm starting to love 2010, simply because this semester, I don't have any classes on Friday. Which mean, by Thursday, I can relax or just go back to home. Some more, I only have four final papers, so less burden than previous semester. Currently still thinking on where should I further my study. Obviously a big NO to oversea study (I'm not interested, unless Japan, YES.), still cant make any decision yet. My UPU also still not registered.

I'm thinking of a place that is close to my home (Klang Valley area). Got a few options. The first one is from the UPU, which mean local university. Which also mean, freakin' cheap fees and mostly will be filled with average Malays (Not a racist statement okay?). UIA, UiTM, UPM, UKM, and finally UM. All those are close to my home. Just a bit risky coz I am from UTM, therefore less chances to get a place in other university unless Im going to Skudai, which I'm not interested to go there too.

Another option is of course, private college or semi private. There's only one semi-private college that I'm interested with, which is the UNITEN. The reason being is becoz it is super close (other than UKM and UPM) to my home. Fees is a bit expensive, for 5 years (Foundation + Degree) it will cost you almost RM60k.

And since I am gonna get my Diploma soon, might cut a few years in the full semester. So, still no decision. And what course should I take? Seriously, I'm not interested in Civil Engineering at all. Maybe Road Engineering and Environmental Engineering are better than pure Civil. Unless I'm jumping to Automotive, than that's different things. But I can't unless I'm willing to spend a few more yearslah. This matter had been bugging me for a few days already.

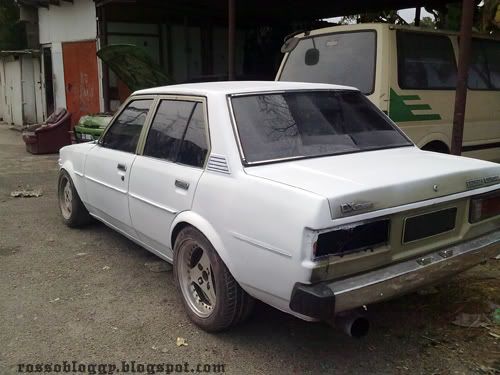
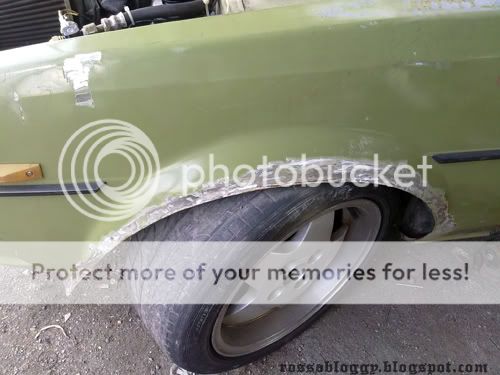
Meanwhile, I went to the paint shop today to send some stuffs. Looks like Jimmy, the painter had fitted in the new fender. He did some rolling too. Looks nice, even though without any over fender.


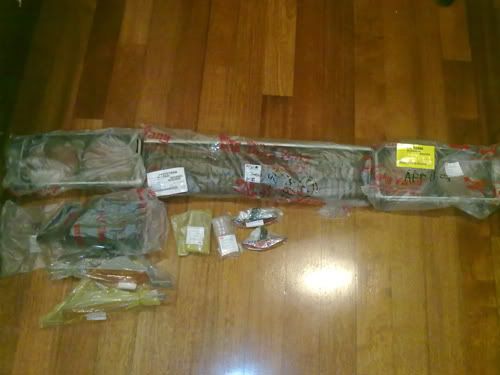
The painting materials. NH-OX Honda Championship White, 2k clear coat, body filler and some sand papers. One more thing that is missing is the primer coat.


Solid? Or 2k?


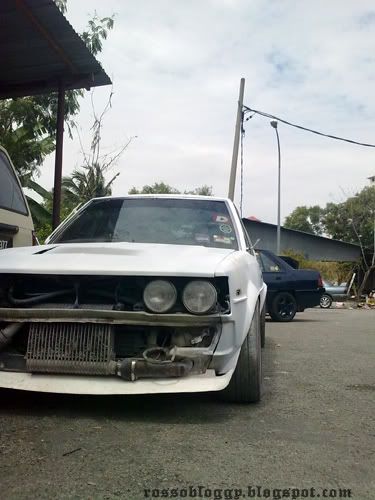
Adjusting the front spoiler's position and some marking had been made. Cant wait for the final results soon!


Painting process? In 2 weeks without a vented hood. And in 3 weeks with vented hood. All will be done in the same shop. And the best part is the shop is super close to my college, so I can check the progress regularly.

While I was in the paint shop area, found out this monster at Sejagat. Belongs to Wadi. Dammmn. 12jj I think. And the front is 10jj. Respect!

And I tried a fast food chain, called the Popeye and something something. The foods are bad. Too dry and salty. This is the Chicken Tender. Cost me RM10 I think. Marrybrown is better than this. Hope they will improve somehow.